
Before you can start learning Django, you must install some software on your computer. Fortunately, this is a simple three-step process:
- Install Python
- Install a Python Virtual Environment; and
- Install Django
This chapter assumes you are running Windows or macOS. If you are using Linux, there are many resources on the Internet—the best place to start is Django’s own installation instructions.
This chapter also assumes you’re installing Django on a desktop or laptop computer and will use the development server and SQLite to run all the code in this book. This is by far the easiest and best way to set up Django when you are first starting.
Installing Python on Windows
A lot of Windows applications use Python, so it may be already installed on your system. You can check this out by opening a command prompt or running PowerShell, and typing python at the prompt.
If Python isn’t installed you’ll get a message saying that Windows can’t find Python. If Python is installed, the python command will open the Python interactive interpreter:
Python 3.13.15 (tags/v3.13.15:4061bc4, Aug  5 2026, 13:05:39) ... on win32
Type "help", "copyright", "credits" or "license" for more information.
>>>
Code language: JavaScript (javascript)
You can see in the above example that my PC is running Python 3.13.15. Django 6.x is compatible with Python version 3.12 and later. However, because there is often a mismatch between the latest release of Python and the highest version of Python that Django supports, we are going to use Python 3.14 for all of the code in this book.
Python 3.14 will be supported for the entire Django 6.x release, so you will have no problems running the code in future versions of Django 6.
If you have a version of Python on your machine other than 3.14, I highly recommend you follow the instructions below for the most trouble free experience.
Assuming Python 3.14 is not installed on your system, you first need to get the installer. Go to https://www.python.org/downloads/ and scroll down until you see Python version 3.14 and then click the “download” link.
This will open another page with all the downloadable files for Python 3.14. Scroll down to near the bottom and select “Windows installer (64-bit)” from the list.
Once you have downloaded the Python installer, go to your downloads folder and double click the file python-3.x.x-amd64.exe to run the installer. The installation process is the same as any other Windows program, so if you have installed software before, there should be no problem here; however, there is one essential customization you must make.
By default, the Python executable is not added to the Windows PATH. For Django to work correctly, Python must be listed in the PATH statement. Fortunately, this is easy to rectify—when the Python installer screen opens, make sure Add python.exe to PATH is checked before installing (Figure 2-1).
Do Not Forget This Step!
It will solve most problems that arise from Windows not knowing where to find your Python installation.
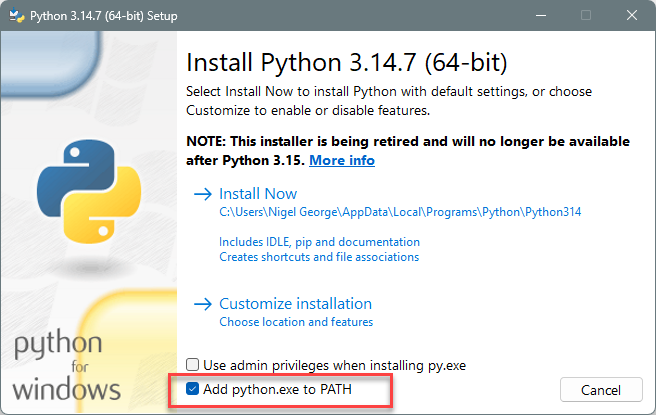
Figure 2-1: Check the “Add python.exe to PATH” box before installing.
Once Python is installed, open a new command window, and type py -3.14 at the command prompt. You should see something like this:
C:\Users\nigel> py -3.14
Python 3.14.7 (tags/v3.14.7:823f032, Aug  5 2026, 10:51:32) ... on win32
Type "help", "copyright", "credits" or "license" for more information.
>>>
Code language: JavaScript (javascript)
Installing Python on macOS
Downloading a copy of Python 3 for macOS follows the same process as Windows—Go to https://www.python.org/downloads/, select version 3.14 from the list and download the macOS installer from the Python 3.14 releases page.
The Mac installer is in .pkg format, so once it’s downloaded, double-click the file to run the package installer (Figure 2-2).
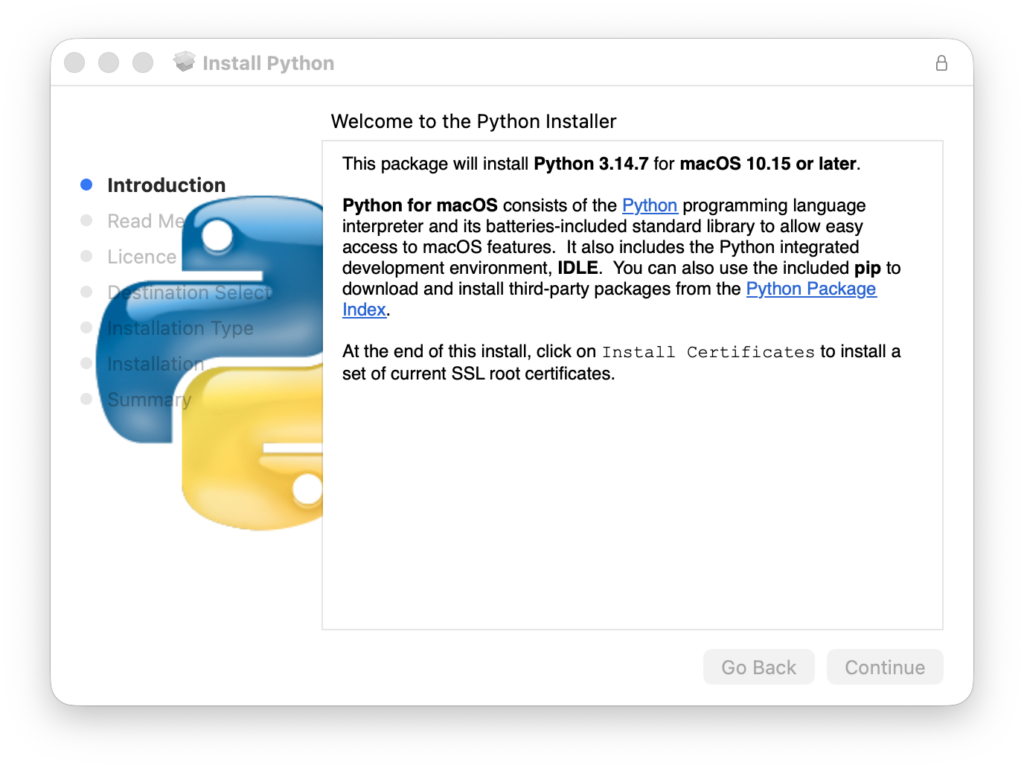
Figure 2-2: Follow the prompts to install Python 3 on macOS.
Follow the installation steps and, when Python 3 has been installed, open a new terminal window. If the installation was successful, typing python3.14 at the prompt will open the Python 3 interactive shell (Figure 2-3).
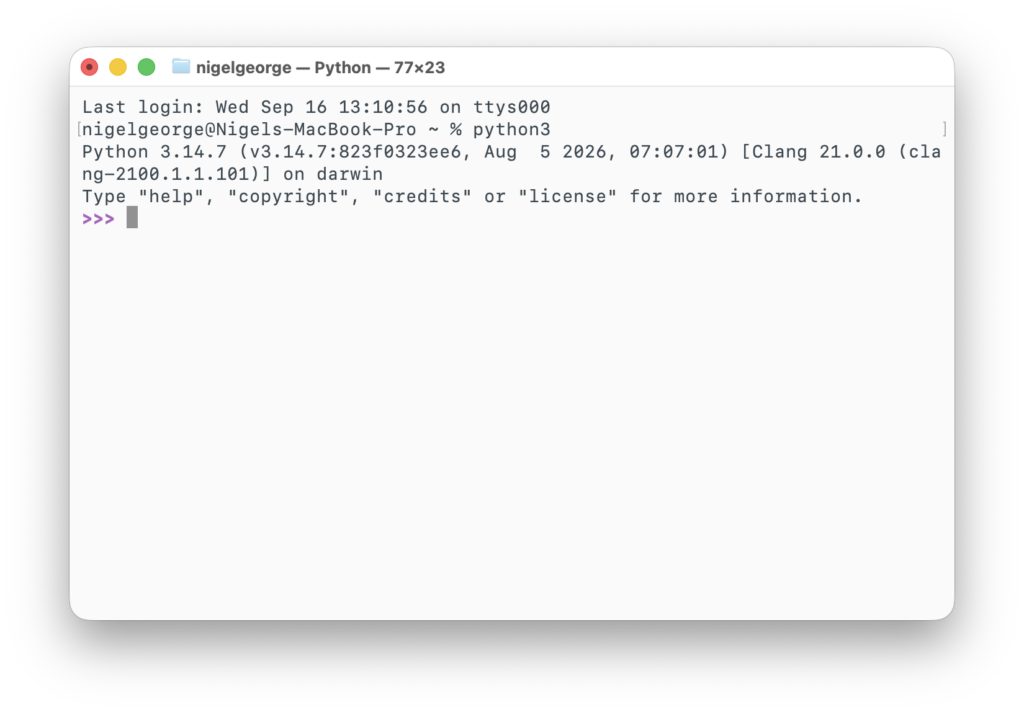
Figure 2-3: Once Python 3 is installed, run it from the terminal with the python3.14 command.
Creating a Python Virtual Environment
When you are writing new software programs, it’s possible (and common!) to modify dependencies and environment variables that your other software depends on. This can cause many problems, so should be avoided. A Python virtual environment solves this problem by wrapping all the dependencies and environment variables that your new software needs into a filesystem separate from the rest of the software on your computer.
The virtual environment tool in Python is called venv, but before we set up venv, we need to create our club site project folder.
Create a Project Folder
Our project folder will house not only our virtual environment, but all the code and media for our Django club site.
The project folder can go anywhere on your computer, although it’s highly recommended you create it somewhere in your user directory, so you don’t get permission issues later on. A good place for your project in Windows is your Documents folder. On a Mac your Documents folder is also a logical choice; however, it can go anywhere in your user directory.
Create a new folder on your system. I have named the folder myclub_project, but you can give the folder any name that makes sense to you.
For the next step, you need to be in a command window (terminal on Linux and macOS). The easiest way to do this in Windows is to open Windows Explorer and right-click the folder to get the context menu and click on Open in Terminal (Figure 2-4). If there is no Open in Terminal option, hold the shift key and then right click the folder.
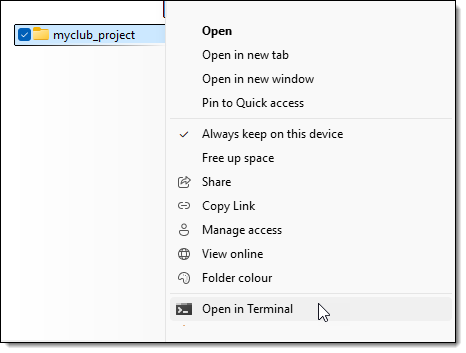
Figure 2-4: Right-click a folder to open a command window. If there is no Open in Terminal option, hold the shift key and then right click the folder.
On Mac, you can right-click and select New Terminal at Folder from the menu. If you don’t have the option to open a terminal, you’ll need to switch it on in Finder > Services > Services Settings > Files and Folders.
Create a Python Virtual Environment
Once you have created your project folder, you need to create a virtual environment for your project by typing the following at the command prompt you just opened:
On Windows
...\Documents\myclub_project> py -3.14 -m venv env_myclub
Code language: CSS (css)
On Mac
...$ python3.14 -m venv env_myclub
Remember, you must be inside the project folder!
A Note of Caution:
Both Windows and macOS will happily run multiple versions of Python on the one machine, which is why you must explicitly state Python 3.14 when you install the virtual environment, just in case you have another version of Python running on your machine.
The function of this command is straightforward—the -m option tells Python to run the venv module as a script. venv in turn requires one parameter: the name of the virtual environment to be created. So this command is saying “create a new Python virtual environment and call it env_myclub“
Once venv has finished setting up your new virtual environment, it will switch to an empty command prompt. When it’s done, open Windows Explorer (Finder on a Mac) and have a look at what venv created for you. In your project folder, you will now see a folder called \env_myclub (or whatever name you gave the virtual environment). If you open the folder on Windows, you will see the following:
\Include
\Lib
\Scripts
pyvenv.cfg
Code language: CSS (css)
On a Mac, it’s:
/bin
/include
/lib
pyvenv.cfg
Code language: PHP (php)
On either platform, if you look inside the \Lib folder, you will see venv has created a complete set of Python packages for you, separate from your other software, so you can work on your project without affecting other software on your system.
To use this new Python virtual environment, we have to activate it, so let’s go back to the command prompt and type the following:
On Windows
env_myclub\scripts\activate
On Mac
source env_myclub/bin/activate
This will run the activate script inside your virtual environment. You will notice your command prompt has now changed:
(env_myclub) ...\Documents\myclub_project>
On a Mac, the prompt looks like this:
(env_myclub) user@computer myclub_project %
Code language: CSS (css)
The (env_myclub) at the beginning of the command prompt lets you know that you are running in the virtual environment.
Oops! Script Error!
If you are using PowerShell and running this script for the first time, the activate command will throw a permission error.
If this happens to you, open PowerShell as an administrator and run the command:
Set-ExecutionPolicy remoteSigned
Code language: JavaScript (javascript)
If you don’t have admin access on your machine, you can run:
Set-ExecutionPolicy -ExecutionPolicy RemoteSigned -Scope CurrentUser
Code language: JavaScript (javascript)
Once you have run this command, the activation script will run.
If you want to exit the virtual environment, you just type deactivate at the command prompt:
(env_myclub) ...\Documents\myclub_project> deactivate
C:\...\Documents\myclub_project>
Installing Django
Mac Users Note
Once Python 3 and the virtual environment are installed, the installation steps and coding for Django are identical on both Windows and macOS.
Just remember, I’ve kept the Windows backslash convention for the book so Windows users can distinguish between Windows native backslashes and Django code and URL conventions.
Now we have Python installed and are running a virtual environment, installing Django is super easy, just type the command:
pip install "django>=6.0,<7"
Code language: JavaScript (javascript)
If you are not familiar with the pip command, put briefly, it’s the Python package manager and is used to install Python packages. To keep with Python programming tradition, pip is a recursive acronym for “Pip Installs Packages”.
This will instruct pip to install the latest version of Django 6 into your virtual environment. Your command output should look like this:
Collecting django<7,>=6.0
  Downloading django-6.1.1-py3-none-any.whl.metadata (3.9 kB)
Collecting asgiref>=3.9.1 (from django<7,>=6.0)
  Downloading asgiref-3.12.1-py3-none-any.whl.metadata (9.4 kB)
Collecting sqlparse>=0.5.0 (from django<7,>=6.0)
  Downloading sqlparse-0.6.0-py3-none-any.whl.metadata (6.0 kB)
Downloading django-6.1.1-py3-none-any.whl (8.4 MB)
   ━━━━━━━━━━━━━━━━━━━━━━━━━━━━━━━━━━━━━━━━ 8.4/8.4 MB 24.7 MB/s  0:00:00
Downloading asgiref-3.12.1-py3-none-any.whl (25 kB)
Downloading sqlparse-0.6.0-py3-none-any.whl (50 kB)
Installing collected packages: sqlparse, asgiref, django
Successfully installed asgiref-3.12.1 django-6.1.1 sqlparse-0.6.0
Code language: HTML, XML (xml)
To test the installation, go to your virtual environment command prompt, start the Python interactive interpreter by typing python and hitting Enter. If the installation was successful, you should be able to import the module django:
(env_myclub) ...\myclub_project>python
Python 3.14.7 (v3.14.7:823f0323ee6, Aug  5 2026, 07:07:01) ...
Type "help", "copyright", "credits" or "license" for more information.
>>> import django
>>> django.get_version()
'6.1.1' # Your version may be different.
>>> exit
Code language: PHP (php)
Don’t forget to exit the Python interpreter when you are done.
You can also check if Django has been installed directly from the command prompt with:
(env_myclub) ...\myclub_project>python -m django --version
6.1.1 # Your version may be different.
Code language: CSS (css)
Starting a Project
Once you’ve installed Python and Django, you can take the first step in developing a Django application by creating a Django project.
A Django project is a collection of settings and files for a single Django website. To create a new Django project, we’ll be using a special command to auto-generate the folders, files and code that make up a Django project. This includes a collection of settings for an instance of Django, database configuration, Django-specific options and application-specific settings.
I am assuming you are still running the virtual environment from the previous installation step. If not, start it again with env_myclub\scripts\activate on Windows or source env_myclub/bin/activate on Mac.
From your virtual environment command line, run the following command:
(env_myclub) ...\myclub_project>django-admin startproject myclub_site myclub_root
This command will automatically create a myclub_root folder in your project folder, which is your Django project. Inside the myclub_root folder is a second folder—myclub_site—which contains all the necessary files for a basic, but fully functioning Django website. Feel free to explore what startproject created now if you wish, however, we will go into greater detail on the structure of a Django project in the next chapter.
Aside: The Root Install Option
You will often see other tutorials that create a Django installation at the root of your project folder like this:
django-admin startproject myclub_site .
This creates your Django website at the main project root, eliminating the nested myclub_root folder in our case.
I don’t recommend this for one very simple reason—it puts Django Python package at the same level as your virtual environment which can get ugly later when you are trying to package and distribute an entire Django application.
Creating a Database
Django includes several applications by default (e.g., the admin program and user management and authentication). Some of these applications make use of at least one database table, so we need to create tables in the project database before we can use them. To do this, change into the myclub_root folder created in the last step (type cd myclub_root at the command prompt) and run the following command:
python manage.py migrate
Code language: CSS (css)
The migrate command creates a new SQLite database and any necessary database tables, according to the settings file created by the startproject command (more on the settings file later). If all goes to plan, you’ll see a message for each migration it applies:
(env_myclub) ...\myclub_root>python manage.py migrate
Operations to perform:
  Apply all migrations: admin, auth, contenttypes, sessions
Running migrations:
  Applying contenttypes.0001_initial... OK
  Applying auth.0001_initial... OK
  Applying admin.0001_initial... OK
  # many more migrations (not shown)
Code language: CSS (css)
The Development Server
Let’s verify your Django project works. Make sure you are in the myclub_root directory and run the following command:
python manage.py runserver
Code language: CSS (css)
This will start the Django development server—a lightweight Web server written in Python. The development server was created so you can develop things rapidly, without having to deal with configuring a production server until you’re ready for deployment.
When the server starts, Django will output a few messages before telling you that the development server is up and running at http://127.0.0.1:8000/.
If you were wondering, 127.0.0.1 is the IP address for localhost, or your local computer. The 8000 on the end is telling you that Django is listening at port 8000 on your local host.
You can change the port by passing a port number to the runserver command, for example:
(env_myclub) ...\myclub_root> python manage.py runserver 7000
Code language: CSS (css)
This command will start the development server at port 7000. It’s unlikely you will need to do this, unless you have another program running at port 8000, or your computer administrator is blocking the port.
Now that the server is running, visit http://127.0.0.1:8000/ with your web browser. You’ll see Django’s default welcome page, complete with a cool animated rocket (Figure 2-5).
It worked!
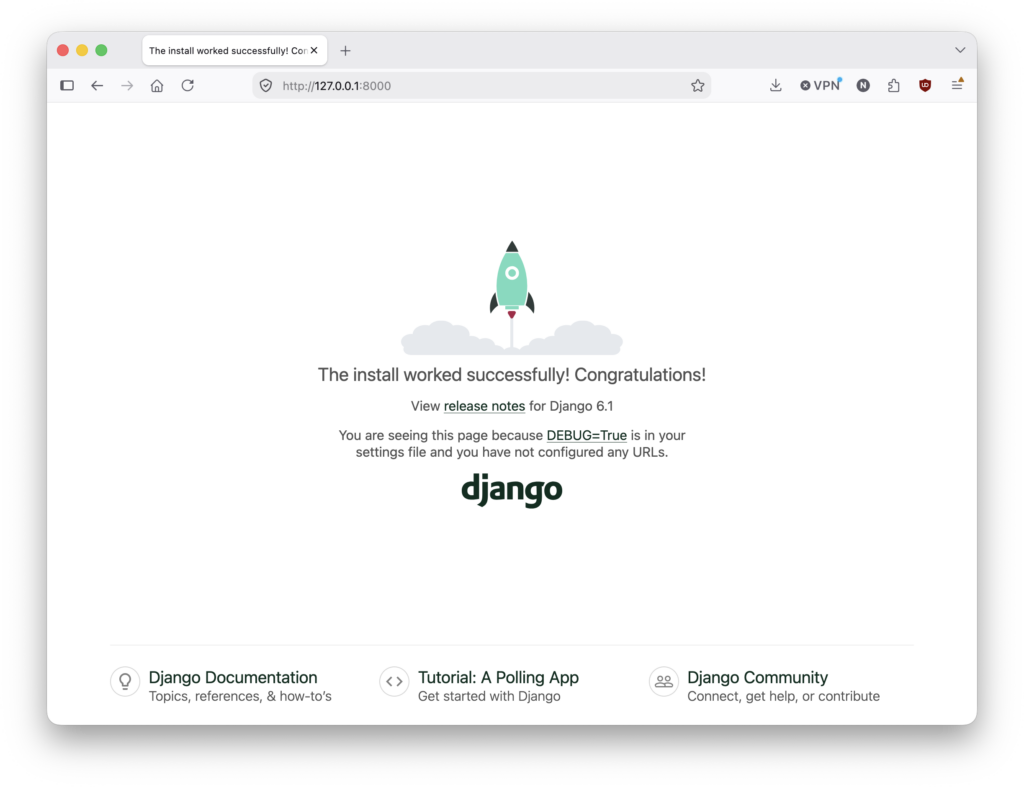
Figure 2-5: Django’s welcome page.
TIP: Remember the Startup Sequence
It will help to make a note of this sequence, so you know how to start your Django project each time you return to the examples in this book:
On Windows:
- Right-click your project folder to open a command window.
- Type in
env_myclub\scripts\activateto run your virtual environment. - Change into your site directory (
cd myclub_root) to runmanage.pycommands (e.g.,runserver). - Type
deactivateto exit the virtual environment.
On macOS:
- Right-click your project folder to open a terminal window.
- Type in
source env_myclub/bin/activateto run your virtual environment. - Change into your site directory (
cd myclub_root) to runmanage.pycommands (e.g.,runserver). - Type
deactivateto exit the virtual environment.
Chapter Summary
In this chapter, I showed you how to install Python 3 and Django 6 on both Windows and macOS. In the next chapter, we will step back a bit and have a big-picture look at Django’s structure and how all the parts of Django work together to create powerful, scalable web applications.